Pages

Sunday, March 30, 2014

Four Upcycled Creations That are for the Birds!

Baby season is upon us....for birds and other creatures who call your yard home it is anyway.  Wouldn't it be nice to offer a helping hand to all those new little families?  Especially if you can add some whimsy to your yard and garden for not a lot of cash at the same time.  Check out these four super quick, cheap and upcycled pieces that grace my garden:


Just have to have one?  You will not believe how incredibly simple each one of these is to make!

1.  Seed Feeder made from a thrifted bud vase, plate and planter
2.  Hummingbird Feeder made from a wine bottle
3.  Bird Bath made from a thrifted plant pot and a decorative bowl
4.  Nest Box made from a thrifted tea kettle and a piece of pallet wood

Most of these projects required not much more than silicone adhesive to complete and are a snap to make!

Which one will you make?

Wednesday, March 26, 2014

How to Make a Strawberry Pot from a Kitty Litter Bucket

If you've been a follower of my blog for any length of time, you know that I love a good Kitty Litter Bucket upcycle!  Who remembers my Kitty Litter Bucket Garden Helper?


Well today, I have a new one...a strawberry pot.  


And, of course, I had to add a little hint (grow babies, grow!).  Yes, there's a tutorial for carving rocks, too:


So, how did I make my strawberry pot you ask.  Well, of course I made a video tutorial for it but here are the instructions:

1.  Using a Hole Saw,make holes in the sides of your kitty litter bucket.  In a smaller Tidy Cats litter bucket I can comfortably fit 3 holes in the narrow side and four on the wider side.  In the larger bucket I like 4 and 5 holes.

2.  Prepare and paint the outside surface of the litter bucket.

3.  Fit a piece of landscapers fabric (or old window screen) to the inside of your bucket and make an X-shaped opening in the fabric everywhere you drilled a hole.

4.  Fill the bottom of your bucket with a nutrient rich soil/compost mixture to the first row of holes and then insert a strawberry plant into each opening.

5.  Add more soil to the second row and add more plants, then to the third row...

6.  Add a few plants to the top of your bucket and place in a sunny location.

7.  Enjoy your strawberries!

So tell me, how do you reuse your kitty litter buckets?

Sunday, March 23, 2014

How to Carve a House Number Plaque from Pallet Wood

My final little DIY project for mom and dad's Mailbox Makeover is this scrap wood house number plaque that I carved with my Dremel.


It's big, you can see it clear down the road...that's what I was going for.  Unfortunately, as the parents age we have to think about things like clearly marked house numbers for the ambulance.  A lesson learned when my dad started having unexplained seizures last summer.  He's better, but big numbers are a good thing.  And this one is totally unique, not another one like it on the block.

This was a pretty easy project.  After painting my wood, I used a High Speed Cutter
in my Dremel to carve the numbers.  Then a few eye screws and a couple plant hooks were all I needed to hang the plaque.  Of course I whipped up a video tutorial so be sure to check it out.

And that wraps up the Mailbox Makeover.  Here's one more look at the finished project:


If you missed my post on that DIY pallet wood edging you can find it here.

Thursday, March 20, 2014

YAAAAAY! Spring Has Sprung!

Happy Spring everyone, it is my favorite time of the year!! Everything is awakening from their Winter Slumber, flowers are starting to show their pretty little heads and the sun (should be) making a few more appearances than it has been.  For many of you, Spring indicates the start of Spring cleaning...not for me.  Unless of course you're referring to cleaning up the garden and outdoor living spaces, then I'm all for Spring Cleaning.

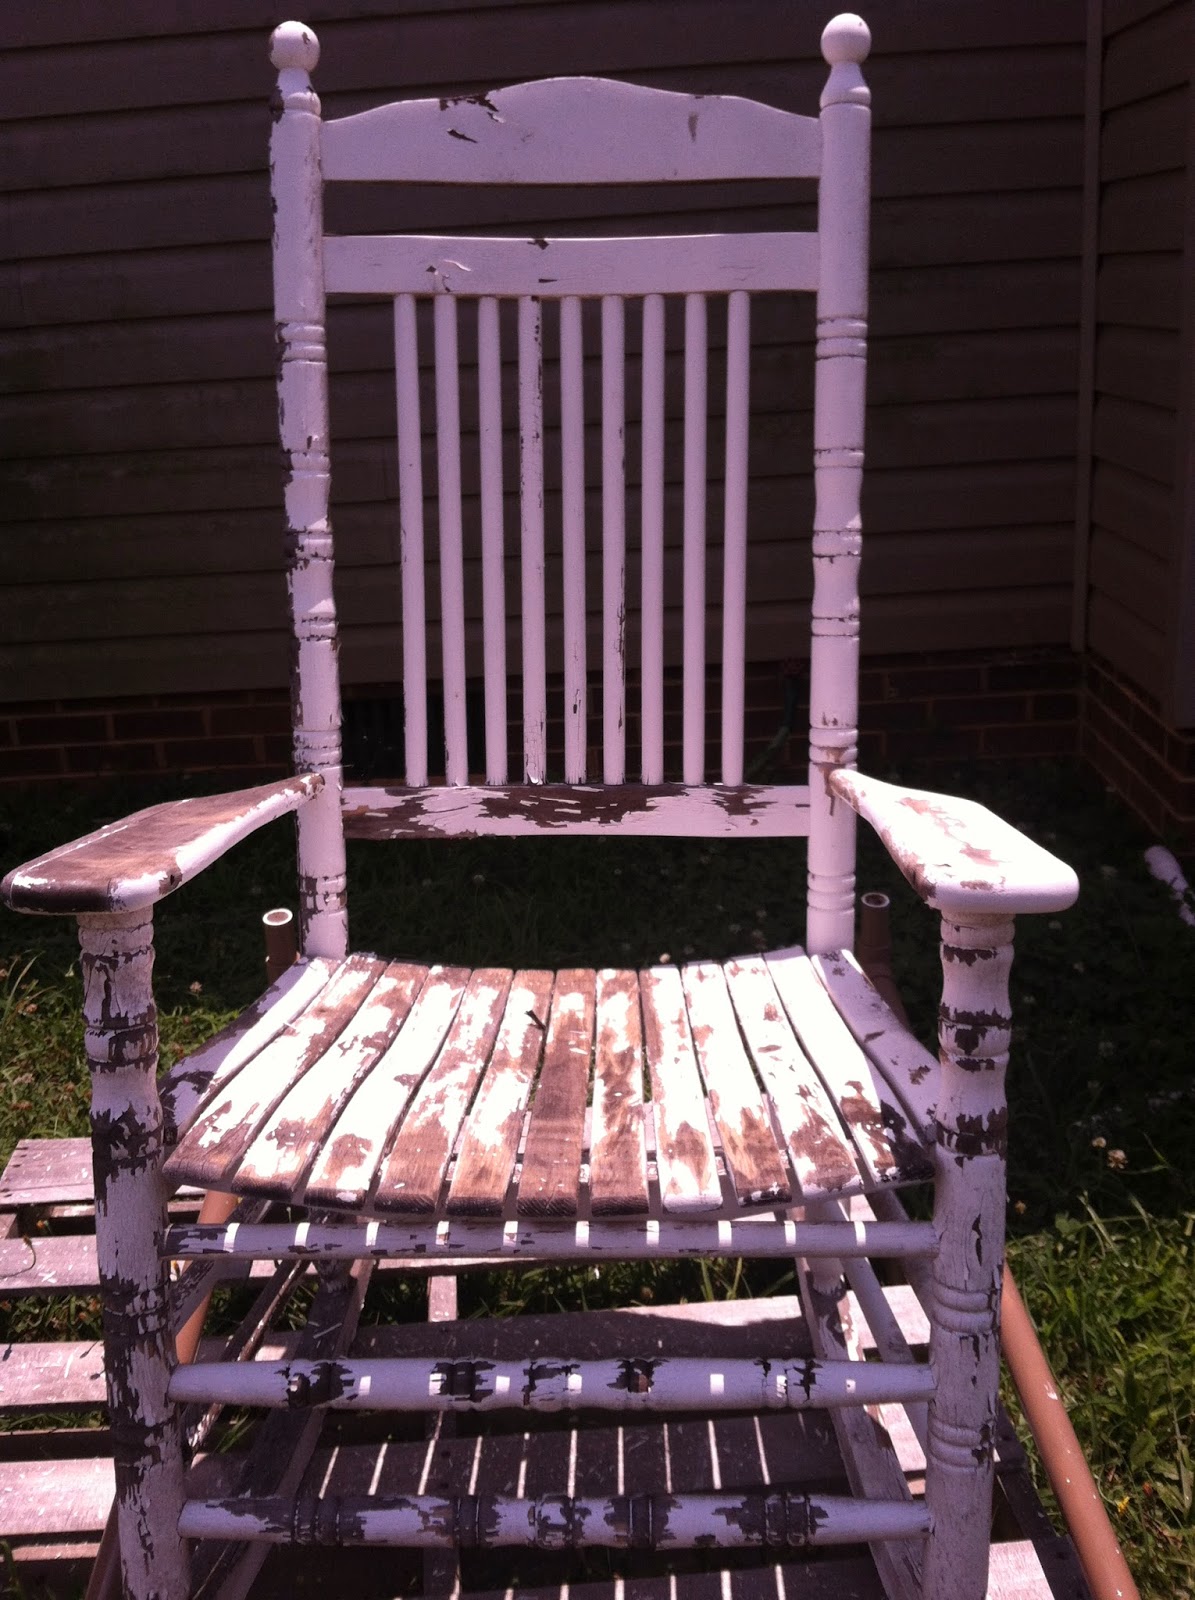
If the same goes for you, then you'll likely be painting something(s).  So check out this disaster:


A rocking chair or two on the front porch is as Southern as fried chicken and since I live in the South...this hot mess just won't do.  However, prepping this baby for painting was NOT going to be fun.  I don't sand anything by hand and my palm sander wouldn't fit between all those spindles.  Enter the Coarse Drill Radial Wire Brush, the best eight bucks I ever spent!


Talk about steel wool on steroids!  This bad boy made such quick work of removing all the loose, chippy paint that I decided to do the wicker love seat too.

After a couple coats of paint and poly here's what we have:


Oh so much better, no?  And the pretty love seat to match, it too was covered in chippy white paint:


The pillows even received a makeover.  They were super faded so they were covered with handmade slip covers.

What will you be "cleaning" this week?

Wednesday, March 19, 2014

How to Make Garden Edging From Pallet Wood

I was pretty tickled with the way this rustic garden edging turned out.  I was even more tickled that I made it from pallet wood and soda bottles!


I made this garden edging as part of a mailbox makeover for my parents 44th wedding anniversary. Be sure to check out the before and after if you missed it. I used wide strips of 2-litter soda bottles to connect 4-plank sections of pallet fencing.  Nine inch lengths of metal dowels were inserted into two planks of each section and hammered into the ground.  It really was as easy as that, you can check out my YouTube channel to see the full tutorial.

Wondering if you have the tools to complete the job?  Here are some that I think would be helpful.


Disclaimer:  While this post contains affiliate links, these are the products that I have previously purchased and regularly use in my craft room.  I do not receive compensation for my opinion, however, I do receive a few pennies commission if you decide to purchase these products through Amazon. More pennies equals more tutorials, thank you for your support!

Sunday, March 16, 2014

A Mailbox Makeover

Not to rub it in for all of my neighbors to the North, but I planted flowers nearly two weeks ago.  Yep, blooming, colorful spring flowers.  It was part of a desperately needed makeover to my parents mailbox area.  It was their 44th wedding anniversary gift.  Check out this before shot:


Now keep in mind, everything is still a bit scraggly because it's not quite Spring yet.  In the summer time that Jasmine is robust with bright yellow flowers.  However, it's all too much.  It's overgrown and (God love him) my dad "prunes" with a weed wacker. So, I knew that no matter what else I did here, that jasmine had to go.  Thankfully, mom agreed.  So out came the Hitachi CR13V2 10-Amp Reciprocating Saw AKA, the
sawzall! 

When figuring out my plan of attack, I wanted to avoid having the utilities come out and mark the underground wires...because I procrastinated and needed to get it done.  What else is new!  So I decided on a somewhat raised bed around the mailbox.  Check out what I made with some old pallet wood and soda bottles, yep, soda bottles. 


Before I did all that though, the mailbox and post needed some work!  Here's a better look:


Forget about all the rust and peeling paint, the hardware is MANGLED.  Looks like it's time for a new mailbox!  HA, I don't think so.  I simply removed the four screws holding the mailbox to the post and the 6 nuts and bolts holding the hardware on and blasted it with some spray paint.  As for the hardware, well that was straightened simply with a little muscle and a rubber mallet.

Besides the fact that the numbers were completely obscured by the jasmine, there were also numbers missing.  I knew I could come up with something better, handmade and upcycled!  Check out the house number plaque that I carved from a piece of pallet with my Dremel:

Now, just add flowers!


Which one do you like better?


See the complete details on how to make:

Garden edging made from pallet wood and soda bottles

Wednesday, March 12, 2014

How to Make a Layered Soda Can Flower Embellishment

For those of you still dealing with temps in the 20's and 30's, I apologize in advance for the next several posts.  We've had two nice weekends in row here in the South (nice enough to paint even!) and I've been gardening!  Yes, gardening.  I'll have a few posts over the next couple of weeks to show you what I've been working on.  For now, how about if we get started with some indoor projects that will make it feel like Spring is here!

I've been making and selling little aluminum embellishments in my Etsy shop for a couple of years now and I just love them.  My customers have come up with some really great ways to use these pieces in their own projects, too.  One of them used these butterflies to make napkin rings and I've used them to make both Christmas tree ornaments and have even added a metal stake to use as garden decoration.


And these adorable tiny flowers were made from the UPC symbol section of soda cans.  One of my customers incorporated them into her jewelry creations.


Today I'm going to show you how to make your own layered soda can flower embellishments.  I've used these flowers as embellishments for gifts but I think they'd be great on handmade cards, too.  And many of my customers have used these as Christmas tree ornaments as well.  Be sure to check out the video tutorial, then tell me how you'll use them!

Want to see what tools I used?  Here are links to the products on Amazon:


Disclaimer:  While this post contains affiliate links, these are the products that I have previously purchased and regularly use in my craft room.  I do not receive compensation for my opinion, however, I do receive a few pennies commission if you decide to purchase these products through Amazon. More pennies equals more tutorials, thank you for your support!

Sunday, March 9, 2014

A St. Paddy's Day Craft for You and the Kids

So, I found a fairly lack-luster country style wreath in the thrift store for a dollar.  Definitely not my style and in desperate need of an update.
So, I grabbed a can of spray paint and a couple of T-shirts.  Here's what I came up with:


Did you catch the spelling error? You know how it is when you spend the better part of a weekend working on a project, shooting video for a tutorial and then go through the editing process only to realize that you made a spelling error on the actual project that you can't fix it without starting all over?  Yeah, that was my weekend so I decided to just live with it. 

I love this project for kids, but that doesn't mean you can't enjoy it too.  To make a similar wreath, you'll need to know how to make T-shirt yarn and T-shirt flowers.   You can find instructions for both projects on my YouTube Channel. The Shamrock shape and banner were also made from T-shirt but I used a bit of fabric stiffener to shape them.  Be sure to check out the video for all the step-by-step instructions.


Monday, March 3, 2014

How to Make a Drawstring Pouch from a T-shirt Sleeve

Happy National Craft Month!! Who's ready for another T-shirt craft?  These are simplest bags (pouches) you'll ever make and they are made from thrifted T-shirt sleeves.  I make them by the boat-load and use them to package up shoppers purchases when I'm working an Art Festival or Farmer's Market. But you can certainly make just one for that something special that you need to wrap.  You will need a sewing machine and scissors but everything is constructed from T-shirts.  Come see how I make these over on YouTube.


Related Posts Plugin for WordPress, Blogger...