Pages

Thursday, May 30, 2013

How to Make a Flower Pot out of Thrifty Kitchen Stuff

I think my Mother's Day Patio Makeover could keep me writing fresh new posts well into the summer!  Here's another such post....

The first thing my mom said when she saw this was, "Is that from my cupboard?"  Of course the answer was, "No!"  But then I thought, "maybe I should have grabbed that one because the last time she used it, I think I was a kid."  Oh well, so here's my thrifted Bundt pan planter:


The supplies are few.  You will need a pan of some sort, some sisal, a drill and a 1/4" and 5/8" drill bits.  If the kitchen item you choose is a heavy duty piece of metal, you'll want to consider drill bits made from Titanium or, even better....Cobalt.


With your 1/4" drill bit, drill several holes in the bottom for drainage.  Then use your 5/8" drill bit to drill four equally spaced holes for the sisal rope to be threaded through.


Now cut two equal lengths of sisal to the size you'll need to hang from your favorite spot on the patio and tie them together in a knot that forms a loop for hanging.  As a side note, even my sisal is upcycled.  You know mom and dad have a pet store right?  Well dad makes all the cat trees in the store from pre-assembled parts.  He had all these obsolete sisal covered scratching posts that didn't work anymore...guess who inherited them!

 
Now feed the resulting four pieces of sisal through the the holes from the inside of the pan and tie a knot on the outside:


All that's left now is to trim the tails from the knots and plant your pan.  Easy Peasy, right?


Your local thrift store is just filled with old unwanted stuff just waiting to be transformed into something pretty and useful, so head out now!  Get that patio oasis started today.

Monday, May 27, 2013

If It's Broke....Fix It

You know the old saying, "if it ain't broke then don't fix it," right?  Well the opposite is also true in my book...if it's broke, fix it.  You know instead of heaving it into the landfill and buying new!  Much of my Mother's Day Patio Makeover had to do with cleaning up and fixing some of the existing pieces that she had in the yard already.  For instance the patio set that she had:


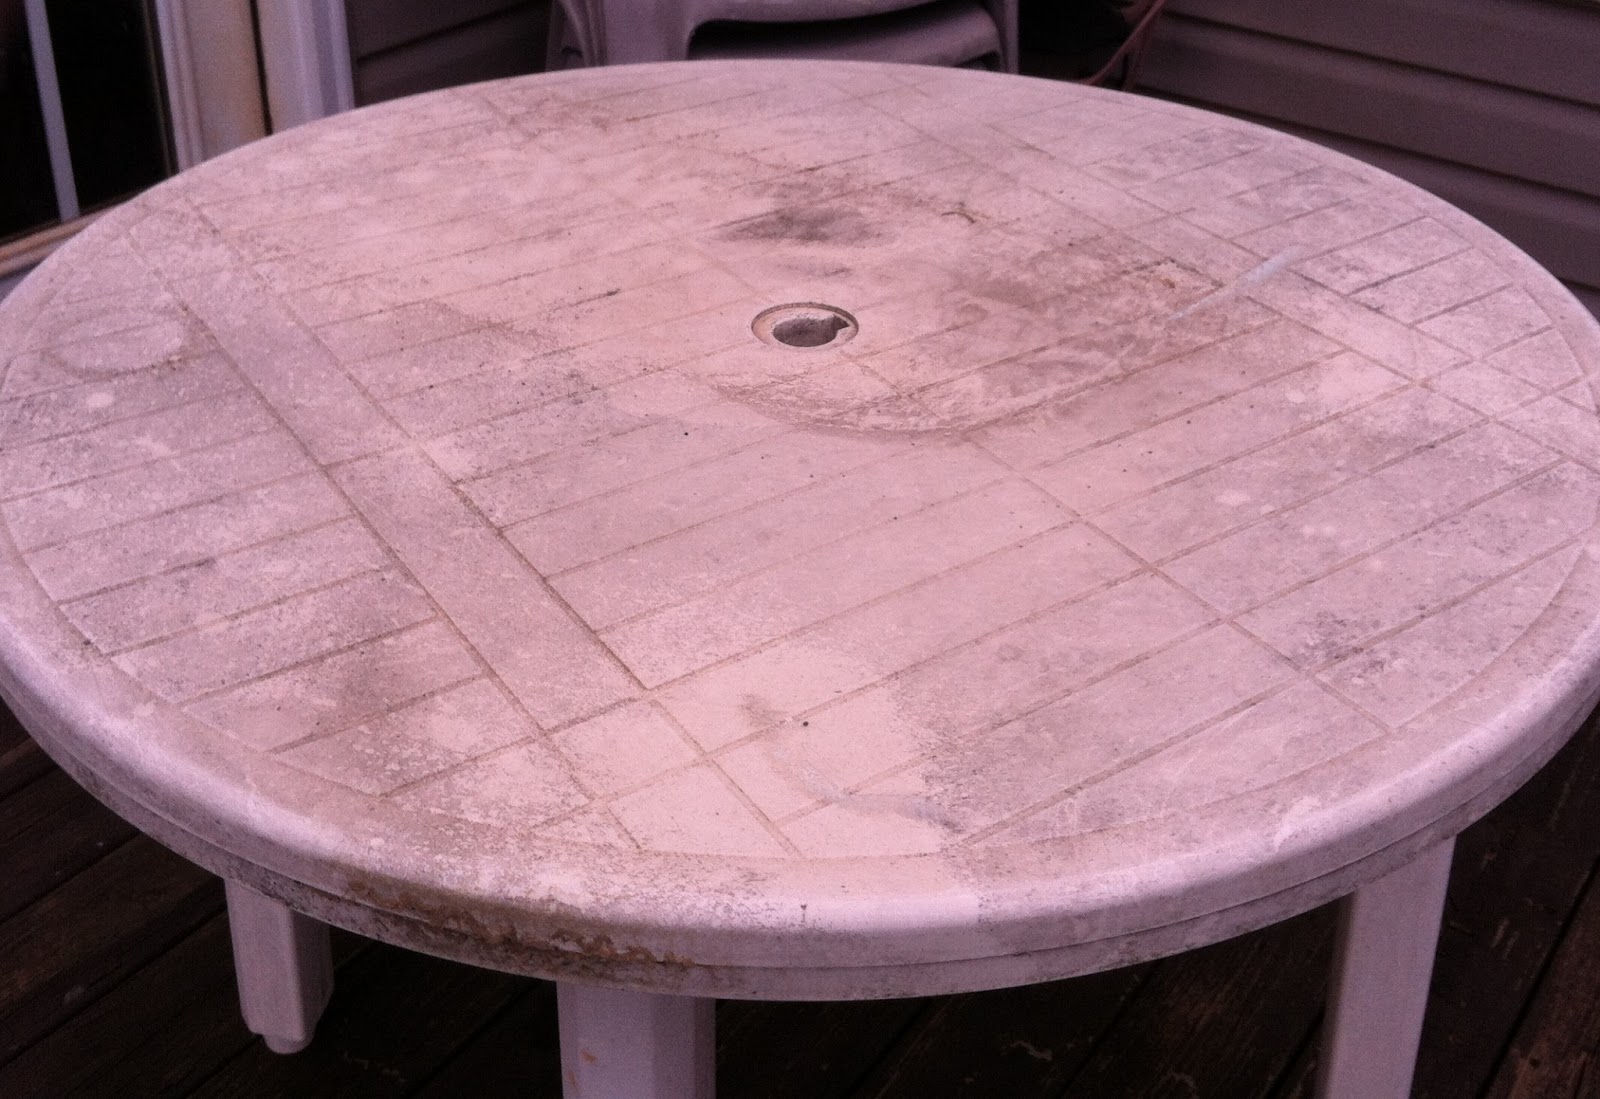
Oh wait, you need a closer look at this....


Yep, That's her white table!  All it really needed was a REALLY good scrubbing and some new paint.  And then, LOOK, nearly good as new! 


If you are planning to paint your plastic patio furniture, be sure to check out my tips section below before you get started.  It could save you a bit of time.  And speaking of painting patio furniture...


This fabulous little seating area was created using two chairs that were rusting and looking nearly abandoned down by the pond that my dad built years ago, stone by stone.  Check these bad boys out:


That's not dirt on the arm rest.  Yes, I went to the painstaking process of taping these off in preparation for repainting them - check it out below.

And then there's this Mosquito Breeding Pond:


At one time this was an actual flower pot with real living plants in it.  But over time it became a mosquito breeding pond that mom would go out and empty after each rain storm...sometimes.  It really only needed to be emptied one last time and then drilled with water drainage holes, like this:


Easy Peasy, right?  All that was left was to add some soil (of course, I tossed in some plastic water bottles and pill bottles to the bottom to lighten the load a bit) and pretty flowers:


Much better than before and it only took a few minutes!

Okay, if you're going to tackle some outdoor furniture painting, let me share a few pearls of wisdom with you.  Just to save you a whole lot of time and frustration.

First of all, set aside some time to clean your furniture really well.  I didn't expect it to take me two hours to clean that plastic furniture but it did.  Nothing is more frustrating to me than a project that takes WAY longer than I expected.

One Down and Three to Go...Plus a Table!
Once you've removed as much of the grime that you can (and you won't get it all) pick a color darker than the original.  I used way too much spray paint to take these tan (not to mention still dirty) chairs to white.  Save yourself the grief, I should have gone with a sunny yellow or purple (mom's favorite colors).

If you're painting chairs that have any sort of fabric on them, you'll need to fully protect and tape off those parts of the furniture.  Check out my masterpiece:


I found it easier to apply a border of tape around the perimeter of the fabric in every spot that it met up with metal that needed painting BEFORE applying any paper.  Then I was sure that there wouldn't be any accidents before laying the paper down.  Once you've covered your fabric with paper, be sure to seal any spots where two sheets of paper meet.  If you're using spray paint and you skip this step you're sure to be disappointed when you see that the over spray discolored your fabric.

And my final tip....have a pop up tent handy in case of rain.  My painting projects kept getting delayed due to rain in the forecast.  Then finally, only 4 days until Mother's Day we had a beautiful sunny day without a stitch of rain in the forecast.  So, what do you think happened as the paint for my last coat on the plastic chairs was coming out of the can?  Yep, it started to rain threatening to ruin my still wet paint job.  I scurried to the garage to grab the not so easy up tent that I use for fairs and festivals just in time to save the day's work from the brief rain shower as it passed through my back yard.

It may sound like a lot of work and I'm not going to lie it can be a pain in the rear but just think of the landfill material you just saved.  Not only that but you saved a whole lot of natural resources by not buying new.  So have at it, go fix some stuff!

Friday, May 24, 2013

Fast Fix Friday: How To Remove a Stubborn Nail

So, I've been messing around with pallets quite a bit lately.  Soon I will post some of my projects and show you how I made them.  You'll be tempted, of course, to take on the projects yourself!  This is one Fast Fix Friday you won't want to miss when you do decide to take on a pallet project, whether one of mine or someone else.

Ah, pallet wood, glorious pallet wood!
I'm going to show you how to remove a stubborn nail that has been cut in half with a sawzall.  But you can apply this method to other projects as well.  Here is what the board looks like after I've separated it from the pallet with my sawzall:


The nail heads are on the other side and pounded in beneath the surface of the wood plank. So the traditional method of pulling it out with a hammer is out.  You'll notice that the bottom nail is actually flush with the plank and the top nail, not so much.  It is actually crooked and buried under the surface of the plank.  To remedy this situation you'll need two things; a hammer and some kind of small screwdriver....okay, okay, there is actually a tool that you can use for this purpose.  It looks like an ice pick with a screw driver handle, please don't ask me to tell you what it's called because I don't know.  But I happen to have this el cheapo, tiny flat head screwdriver kicking around and it works just fine.  And since I've never used it for anything else, I'm using it for this!


Okay, ready?  Place your ice pick thingy (or tiny screwdriver) on the tip end of the nail and give it a couple of love taps with the hammer.  When you flip your board over you'll see that the nail head is now exposed and you can slide your hammer underneath it and pry it out of the plank.


If you are starting with a crooked nail tip simply slide your tool under the nail at about a 45 degree angle and tap it with your hammer until it is standing straight up.  Now you can use the hammer to bang it out.

And SUCCESS!  Now I'm left with nothing more than these charming holes in the plank that will add some character to my final piece.


Fill the holes you say? Never!

Wednesday, May 22, 2013

Come and Strut Your Stuff - I'm Co-hosting a Blog Hop!

I'm super excited to be co-hosting a Blog Hop today, Thursday Favorite Things over on Katherine's Corner to be more precise!  I'm teaming up with Katherine from Katherine's Corner to meet up with other bloggers and see what some of their favorite things are.  I've seen lots of great things on the hop, like great recipes, pictures of beautiful places, great DIY projects...you name it and it's probably been linked up to Thursday Favorite Things!

Right about now you're probably wondering, "Tricia, what is YOUR favorite thing?"  Well, I'm going to tell you.  You probably already know that I like to play with trash, turn it into something new...useful, anything to keep it from the landfill.  And you probably already know that I love to work in the garden!  I know, I know someone out there is yelling, "But I thought you loved animals!"  That, too, is true.  But my absolute favorite thing is showing others how to do what I do, how they too can make a difference. It is the reason that I blog at all.  So, without further ado...


Its Time For Thursday Favorite Things! Thursday favorite things is where you can link your favorite post or write a post about your favorite things and share it with old and new followers. You gain visibility for your blog and make bloggy friends too!

Please share the hop with your readers and let Katherine know if you would like to co-host with her. 
Remember to leave her a comment if you are a new follower so she can follow you back. Here are the rules, yes there are rules. But just a few: Please DO NOT link and run...visit a few of the wonderful blogs that are sharing at the hop.
  • Follow Katherines Corner preferably through Email it’s on her right sidebar (or facebook twitterbloglovin, etc. they are on her sidebar too) And My Blog too
  • Visit as many blogs in the list as you can, please leave a comment so they know you stopped by!
  • Share the button or a linklback on your post. Grab the hop button code from Katherines button page It’s always nice to have the hop button on your post. It IS NOT mandatory; but a Link back to Katherines Corner is always appreciated 
  • No adult content blogs or links directly to your shops please
  • Yes you can link giveaways ( they are everyone's favorite thing) Add your giveaways to the Win It Page at Katherines Corner too!


Tuesday, May 21, 2013

How To Make a Butterfly Feeder from Thrifted Stuff

My Mother's Day Patio Makeover included lots of fun little feeders for birds and butterflies.  Mom loves Hummingbirds so, of course, I added one of my wine bottle hummingbird feeders to the mix:


And tucked away in the same photo is a small butterfly feeder made from a thrifted salad plate and a glass sundae dish.


If you'd like a closer look at the butterfly feeder or want to know how to make one of your own, you can check out this YouTube video or even jump back to a post I wrote last year on how to make a bird bath.  It's the same concept.  And so is this bird seed feeder.  I simply glued a large ceramic candle holder to a fancy flower pot and viola! we have ourselves a colorful bird (and squirrel) seed feeder.


It really doesn't take much to add some color to your gardens, not to mention functional art.  So head out to the thrift store and then pick up some silicone...and get busy.  Make some for your mom and then make some for you.  Everyone needs a beautiful song in the garden, don't they?

Monday, May 20, 2013

A Mother's Day Patio Redo

Last weekend I surprised my mom with a Mother's Day patio makeover. I think you'll agree it was a pretty sad state of affairs before I got my hands on it.  This was pretty much all the patio consisted of:


Pretty sad, right?  The patio furniture all stacked up in the corner was in desperate need of a cleaning.  There was also a broken down old hummingbird feeder (with nectar from last season none-the-less), a worn out bird seed feeder and a colorless child's chair that my 5'4" niece used to sit in...years ago.  With everything that my parents are up to they haven't had the time to put into the yard and patio spaces.  So, for Mother's Day, I added some life to the patio.

Here is the after:


And, I added a little bird garden over here:


This is mom's favorite space because when she raises the bedroom blinds in the morning this is what she sees.  Here are a few more closeups, I'll show you how I did each of these projects over the next couple of weeks.

A cleaned and refinished patio set - almost like new, a planter made from a Bundt pan, and a large planter with an upcyled seed feeder.

A little seating area that includes a couple of refinished chairs that were rusting out in the yard, a table made of pallets and a planter made from a chandelier.

Oh so many projects and oh so little time.  Can't wait to share these DIY project specifics with you!

Related Posts Plugin for WordPress, Blogger...