

For today's blog I thought I'd show you how to upcycle some of those magazines that are piling up around your home to make this fun and eco-friendly coaster:
Just a word of caution; my first coaster took me three hours to make so allow yourself some time to make these. This is a great project to do while your watching television. Before you get started, here's what you'll need:

1. A couple of magazines
2. Something to cut the pages with - scissors are okay but if you have one available to you, I highly recommend a paper cutter.
3. Glue stick
4. Liquid glue (I used Tacky brand glue)
5. Mod Podge
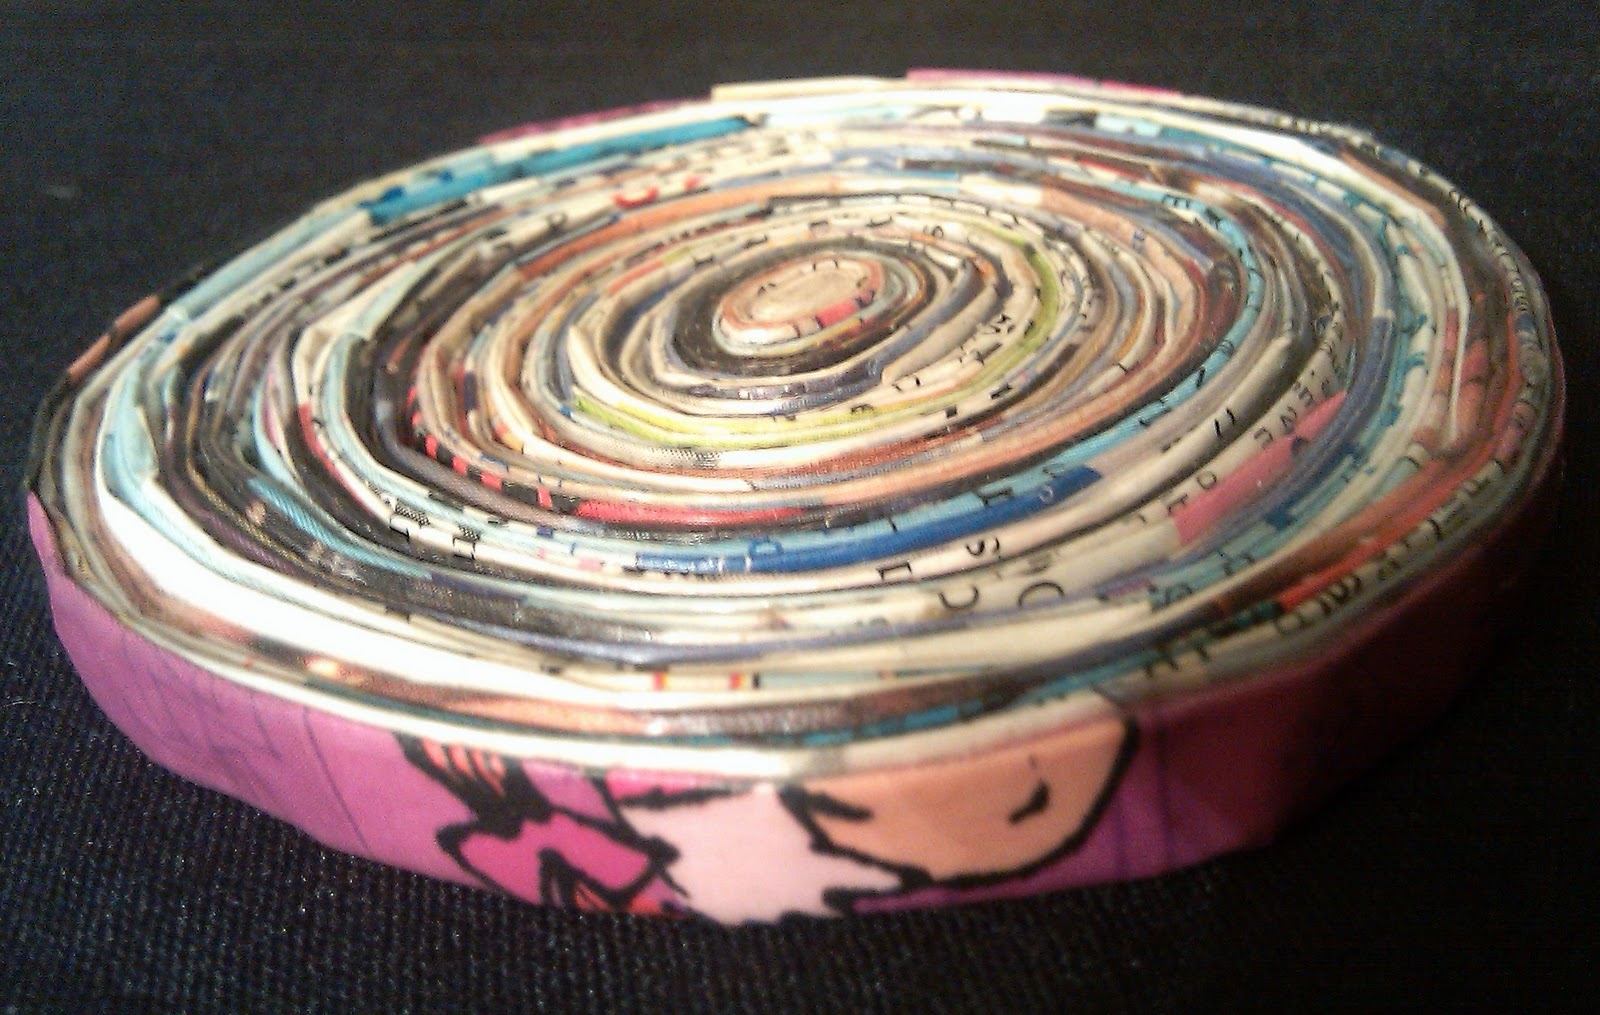
First, you'll want to prepare the strips for coiling. Cut your magazine pages into one inch strips.

Then take a strip and fold it in half the long way.

Unfold the strip and use the fold line as a guide to fold in each side to the center. You'll want to take caution not to allow the edges to overlap.

Run your glue stick along the folded strip,

and refold along the first fold that you made. Repeat until you have MANY skinny strips made! It takes more strips than you can imagine.

Now it's time to start putting your coaster together. Take your first strip and run a small (emphasis on small) amount of liquid glue along the strip and start to coil it.

Continue adding (and adding...and adding) strips being careful to line up the end of one strip with the start of the next. Other artists prefer to overlap the edges of each strip but for this project I do not recommend doing so. This tends to add gaps to your work, not a desirable trait in a coaster!
Once you have your coaster the size you want it coat the entire thing (one side at a time) with a layer of mod podge. Add two more layers, more if needed. Once the coaster is completely cured (approximately 24 hours) it's ready for use. At this point I chose to add a couple coats of a spray varnish. It just felt like a stronger piece to me but it is not necessary.

There it is, ready to use! Now repeat this process until you have a full, eco-friendly set of coasters. Enjoy!
What a great tutorial! And you forgot to mention an added bonus: unlike all of my ceramic coasters, I bet cats can't break these by pushing them onto the floor and watching them shatter!
ReplyDeleteNo....BUT, see that great tray up at the top of my post? It's not the first one I made, it's the second. Before I had a chance to finish it (thankfully) a certain kitty sat on top of it and used it like a scratching toy. I guess it is similar to those cardboard scratching pads that she likes to tear up....so crafter beware!
ReplyDeleteNOW I know why I have been saving seed catalogs since 1994! (Not really, but close). I 'was' going to make beads (Mom did that in the 50's and I still have a beautiful multi-strand she made), but this is practical & beautiful. ;-)
ReplyDeleteThanks, Ginger. I do make beads as well and I have to say I enjoy it very much! People always ask what I paint my beads with...why I tell them I don't they are always surprised!
Delete